Launching a Casper Node with AWS Marketplace
The following tutorial outlines the process for launching a Casper Node through the Amazon AWS Marketplace.
Step 1 - Subscribing
You will first need to subscribe to the Casper node software through the AWS Marketplace. There is no associated cost with this subscription.

If you are not currently signed in to an AWS account, you will need to either sign in or create an account to subscribe.
You need to accept the terms and conditions listed to continue with the subscription. You may also choose a different Amazon EC2 (Amazon Elastic Compute Cloud) instance type if you prefer.
After accepting the terms, it may take a few moments for AWS to process your request. In this event, you will see the Continue to Configuration button grayed out, as shown below:
Once the system processes your request, the button will light orange, and you may continue to the configuration options.
Step 2 - Initial Configuration
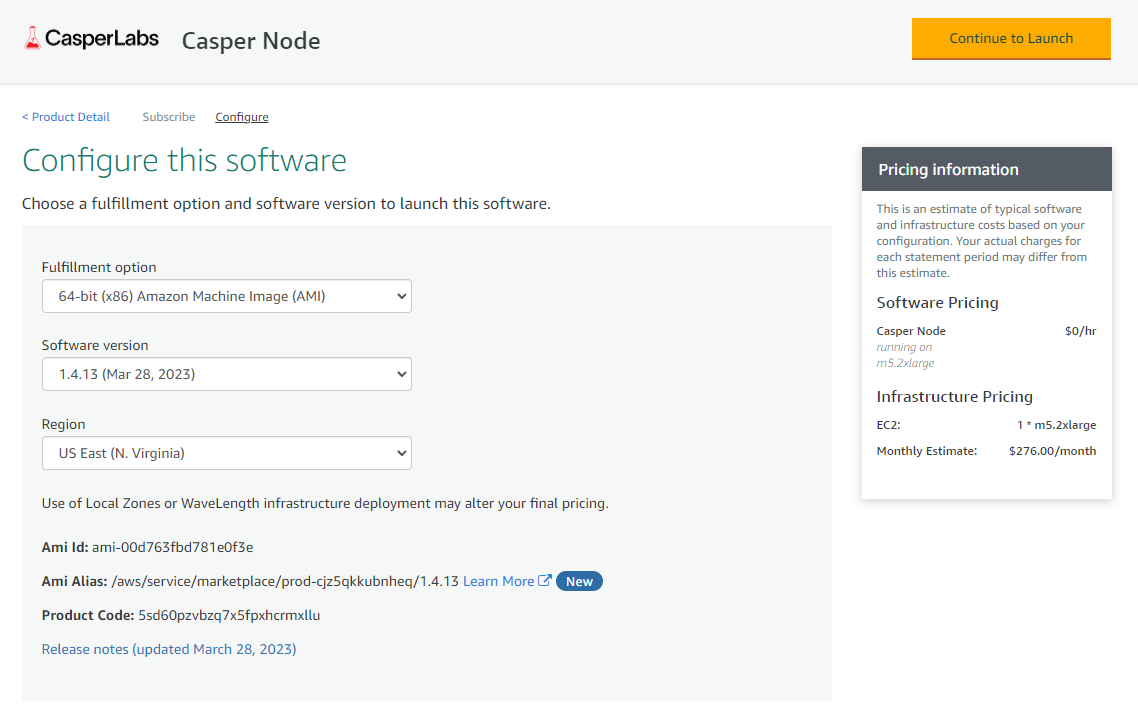
The Configuration page allows you to choose your fulfillment option, software version, and the region in which your node will be hosted. Unless you intend to run your Casper node with a specific legacy version of the software, we suggest using the most current release.
The window on the right will show an estimation of the infrastructure costs from AWS for operating the Casper node, given the EC2 instance type you previously chose.

Step 3 - Launch Configuration
The Launch page will show your previously selected configuration details and a Usage instructions button that leads to the most recent instructions based on your chosen software version.
Below this, you will see a drop-down menu with the title "Choose Action":

This drop-down menu includes the following options:
-
Launch through EC2 - This option launches your configuration through the Amazon EC2 Console
-
Launch from Website - This option will launch directly from the current page, using further configuration options outlined below.
-
Copy to Service Catalog - Copy your configuration of the software to the
Service Catalogconsole, where you can manage your company's cloud resources.
Additional drop-down menus include:
-
EC2 Instance Type - This option determines the machine's specifications that will run your instance of the Casper node software.
-
VPC Settings - This option selects the Virtual Private Cloud you will use for your Casper node. This should be auto-populated, but you can create a new VPC through the EC2 console by clicking the option below the drop-down box.
-
Subnet Settings - This option selects the subnet for your node under the listed VPC above. Again, it should be auto-populated, but you can create a new subnet.
-
Security Group Settings - This option determines the flow of traffic connecting to your Casper node. By clicking on "Create New Based on Seller Settings", you can create a new security group using the suggested default Casper settings.
EC2 Key Pair Settings

You will need an EC2 key pair to launch your Casper node. If you do not already have an EC2 key pair, you can create one directly from this page by clicking "Create a key pair in EC2". This will bring you to the EC2 console, where you can click "Create key pair". This will automatically download your keys in the selected file type, and you can choose the new key pair on the previous page.
Launching Your Node
If you are satisfied with your configuration choices and all options are correctly filled out, you can hit the orange Launch button to launch your AWS-hosted Casper node.